If you want to cancel your Namecheap hosting subscription, there are two ways to do it.
The best way to do it is to turn off auto-renewal on services that you no longer want, and another one is to immediately cancel your service by providing a simple canceling reason and rating about Namecheap and additionally providing feedback comments to them, and then finally submit a cancellation request.
This will result in your subscription being immediately removed.
So let’s get started on both options.
To cancel your Namecheap hosting subscription, follow these simple steps:
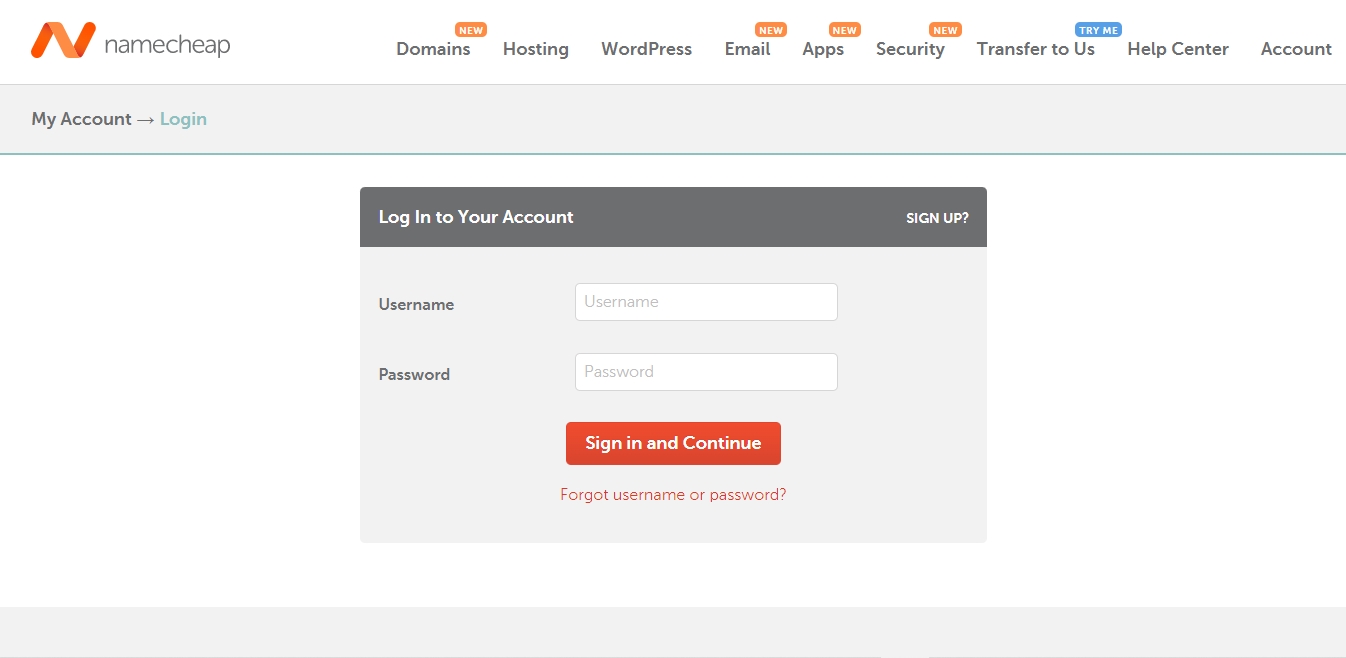
1. Log in to your Namecheap account
First, you need to log into your Namecheap account.
2. Go to Hosting “Hosting List”
After logging in, go to “Hosting List” from the left-hand menu.
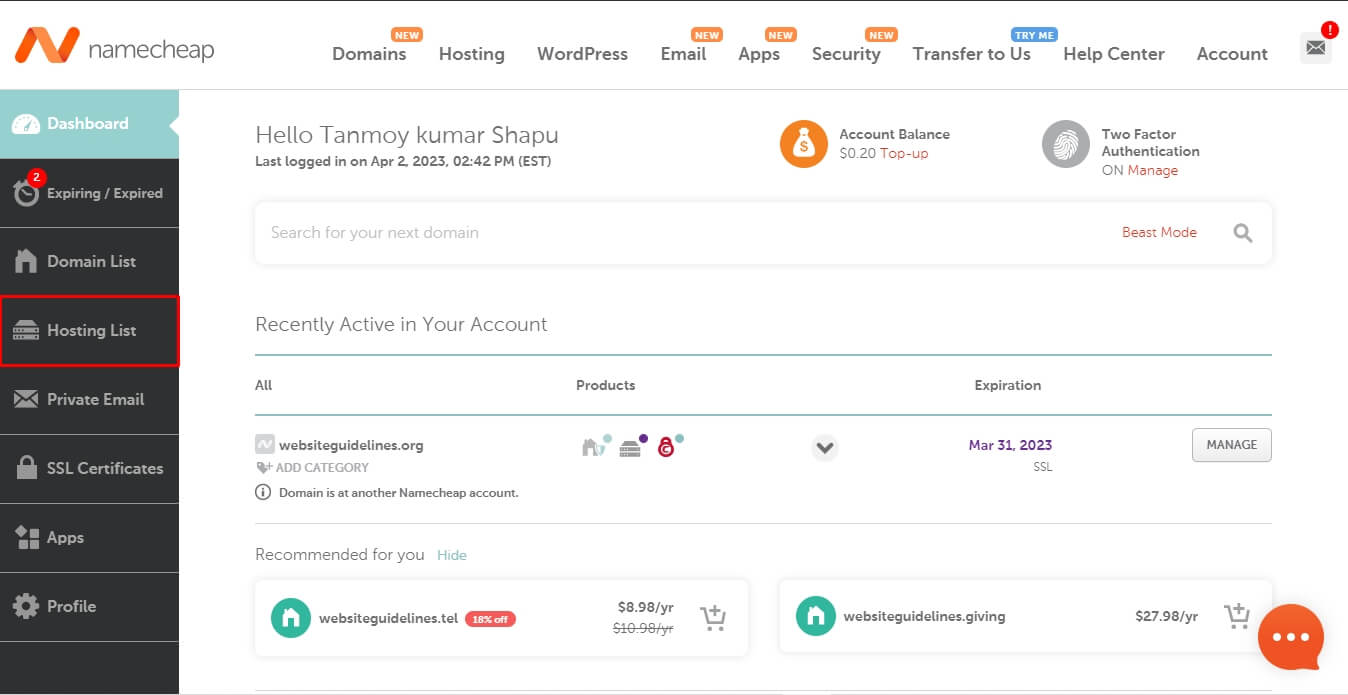
3. Click on “Manage” from the right navigation menu
Click on the Manage option for the hosting service you want to remove that is associated with your domain name.

4. Disable the “Auto-renews every month”
After clicking on Manage, disable “Auto-renews every month“. This will result in the automatic removal of your hosting subscription within three additional calendar days after the hosting expiration date.
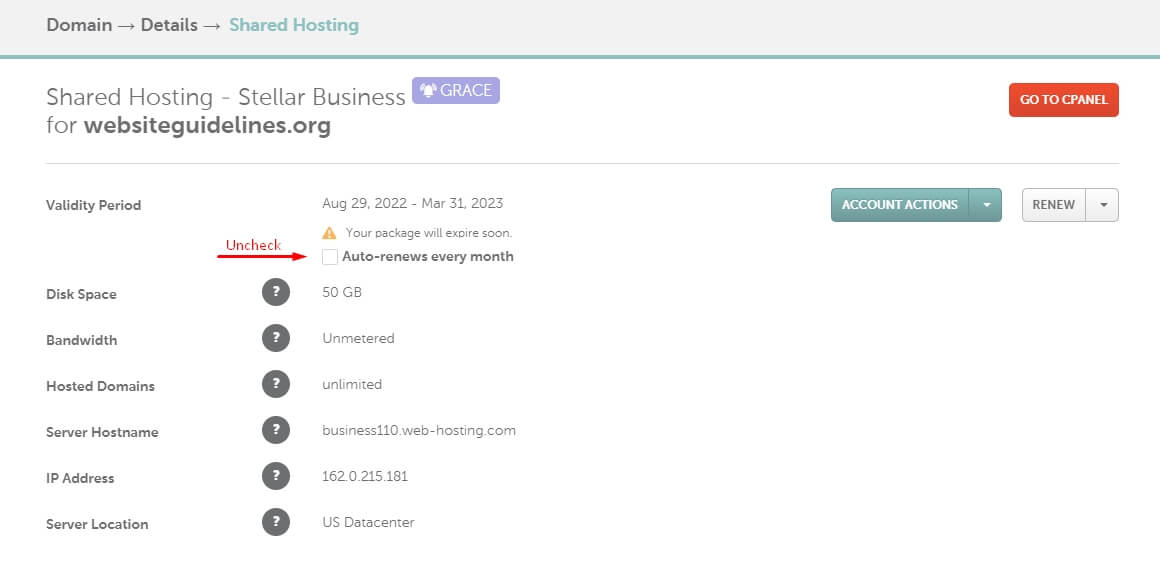
Make sure you turn auto-renew off before the hosting expiration date; otherwise, Namecheap will charge you for your active subscription on the first and third days of the expiration period, and if it isn’t renewed, your hosting account will be removed automatically and all your website data, including backups and databases, will be permanently removed.
In an alternative way, you can delete your subscription immediately.
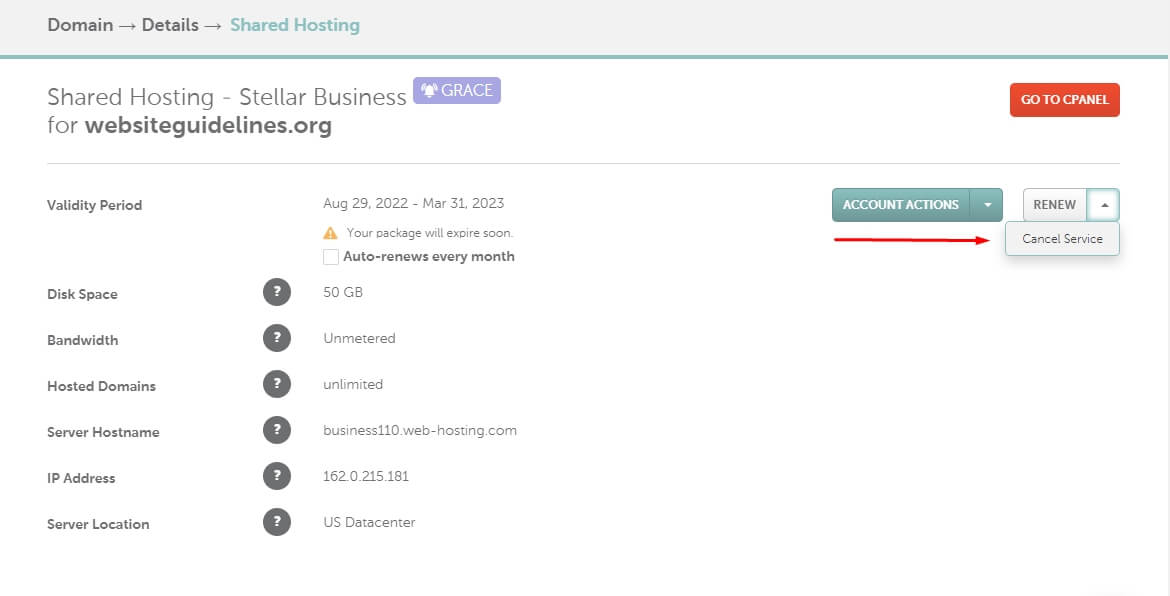
5. Click on the “Cancel Service” button
From the same page of hosting details or manage page, Click on the “Cancel Service” button and go to the next page.
6. Provide a Cancelling “Reason” and Submit your request
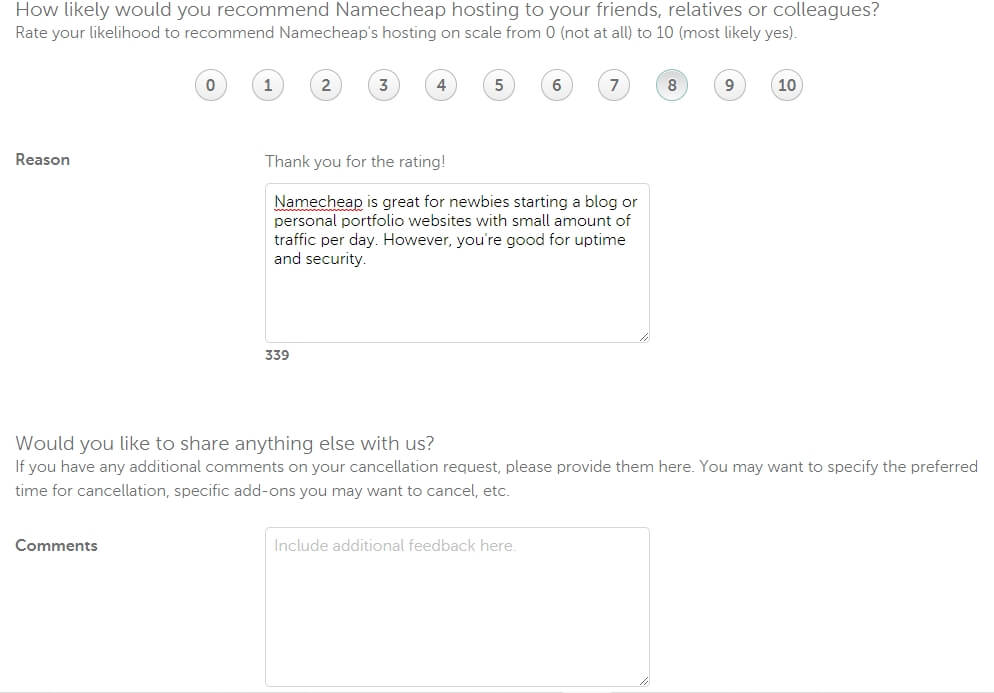
On the Provide Details page, you must give a “Reason” for canceling your Namecheap hosting account.
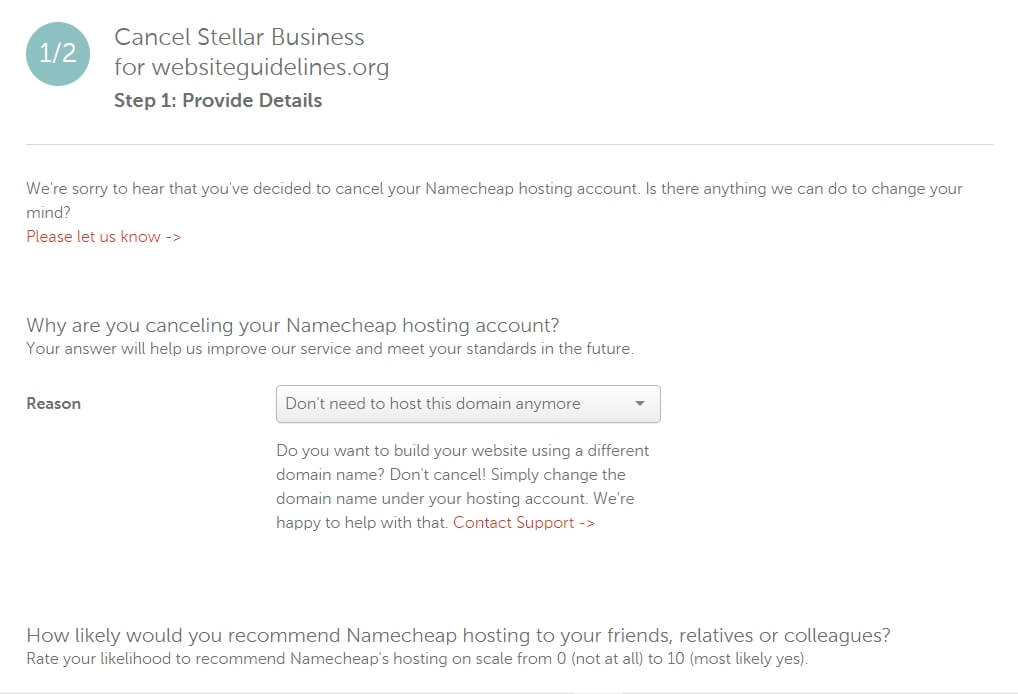
And then, Namecheap asks, How likely would you recommend Namecheap hosting to your friends, relatives, or colleagues? Rate your likelihood to recommend Namecheap’s hosting on a scale from 0 (not at all) to 10 (most likely yes), and it includes an additional comment box to let them know about your experience with them.
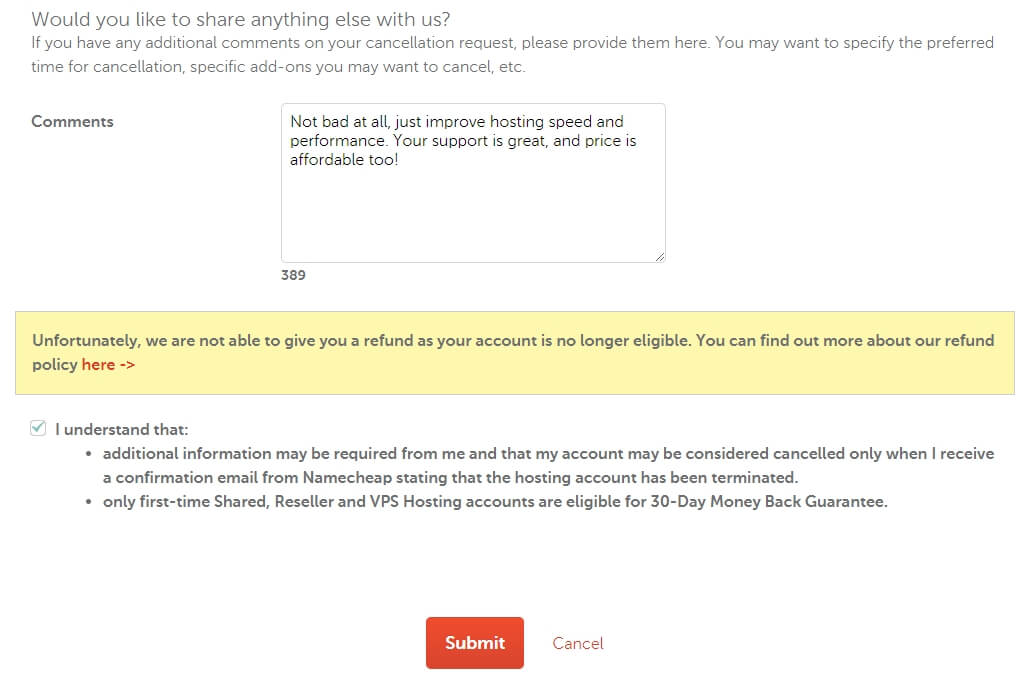
And before submitting your cancellation request, if you have any additional comments on your cancellation request, please provide them here and click on “Submit“.
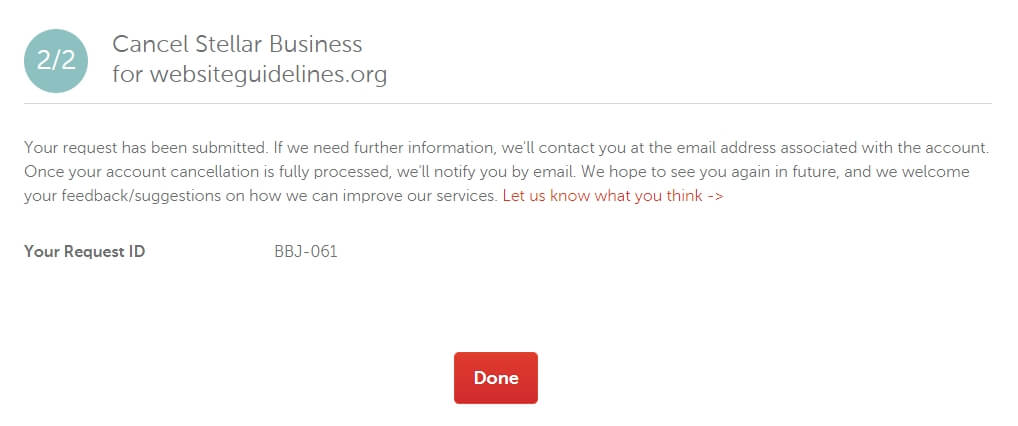
And then it shows that your request has been submitted. And if they need any further information, you’ll be contacted through the email address associated with your account.

Conclusion:
The Namecheap Hosting subscription was canceled successfully.
Now, you can choose any of your favorite hostings from the different types of web hosting services.
However, NameCheap shared hosting is an excellent choice for newbies starting a blog or more than one blog, personal portfolios, and small business websites with a small amount of daily traffic. And the best thing is that it’s affordable and easy to use.
Otherwise, their VPS or dedicated servers are the ultimate choice for heavy-traffic websites, or you might consider other types of web servers for your needs.
If you have any questions you can always contact Namecheap Official Live Chat Support.
I hope this guide was helpful for you today.
If yes, please share this article on your favorite social media site or blog, and if you have any questions, feedback, or suggestions, feel free to reach out to us using our contact form or leave a comment below!
We’ll be happy to hear your thoughts.

