Are you looking to transfer your domain name to Domain.com?
If so, then you are going to choose the right domain registrar, and you are in the right place as well.
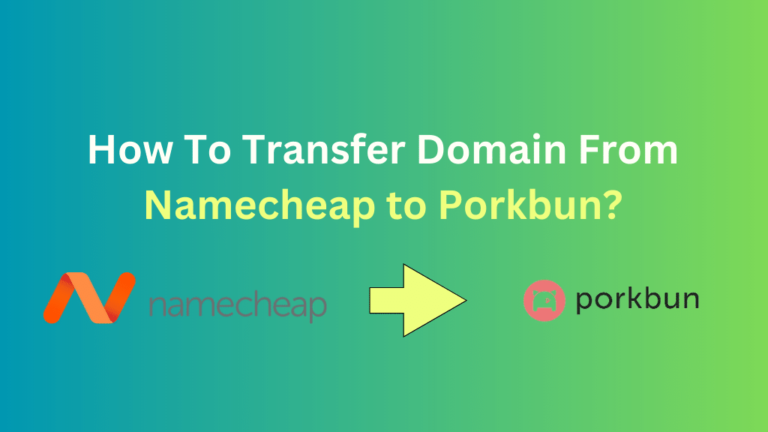
I transferred my domain from Namecheap to Domain.com and wrote a complete step-by-step domain transfer guide here.
Which can help you move your domains from your current domain registrars to Domain.com.
So, let’s get started to transfer the domain names.
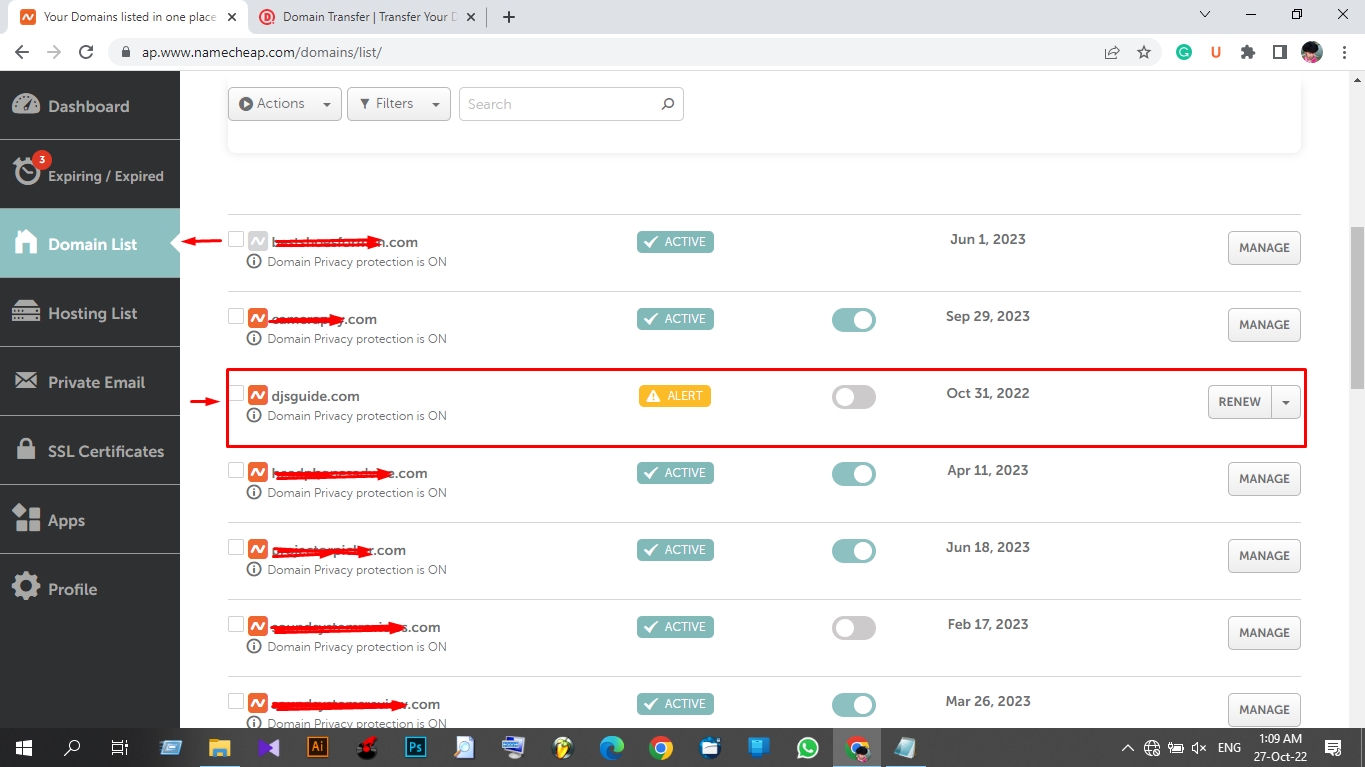
1. Log in to your Current Domain Registrar

Log in to your current domain registrar, from where you want to transfer your domain name to a new domain registrar! For example, you have a domain on namecheap.com and are ready to transfer it to domain.com.
Once logged in to your domain dashboard, go to “Domain List” and click on manage your domain to to go the domain details page to follow the next steps.
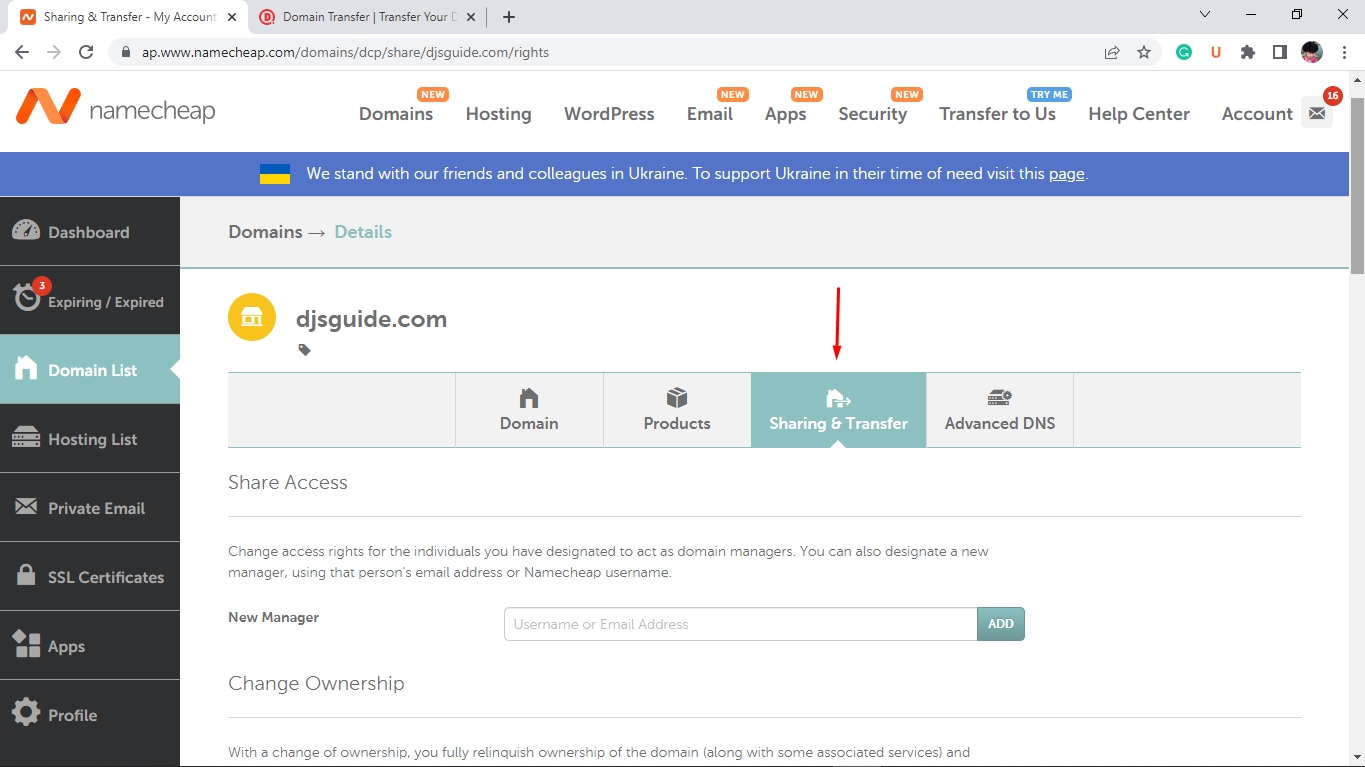
2. Go to Sharing & Transfer settings
On the Domain Details page, you will be on the Domain tab; from there, you need to go to Sharing & Transfer page and scroll down below.
3. Unlock your Domain Name
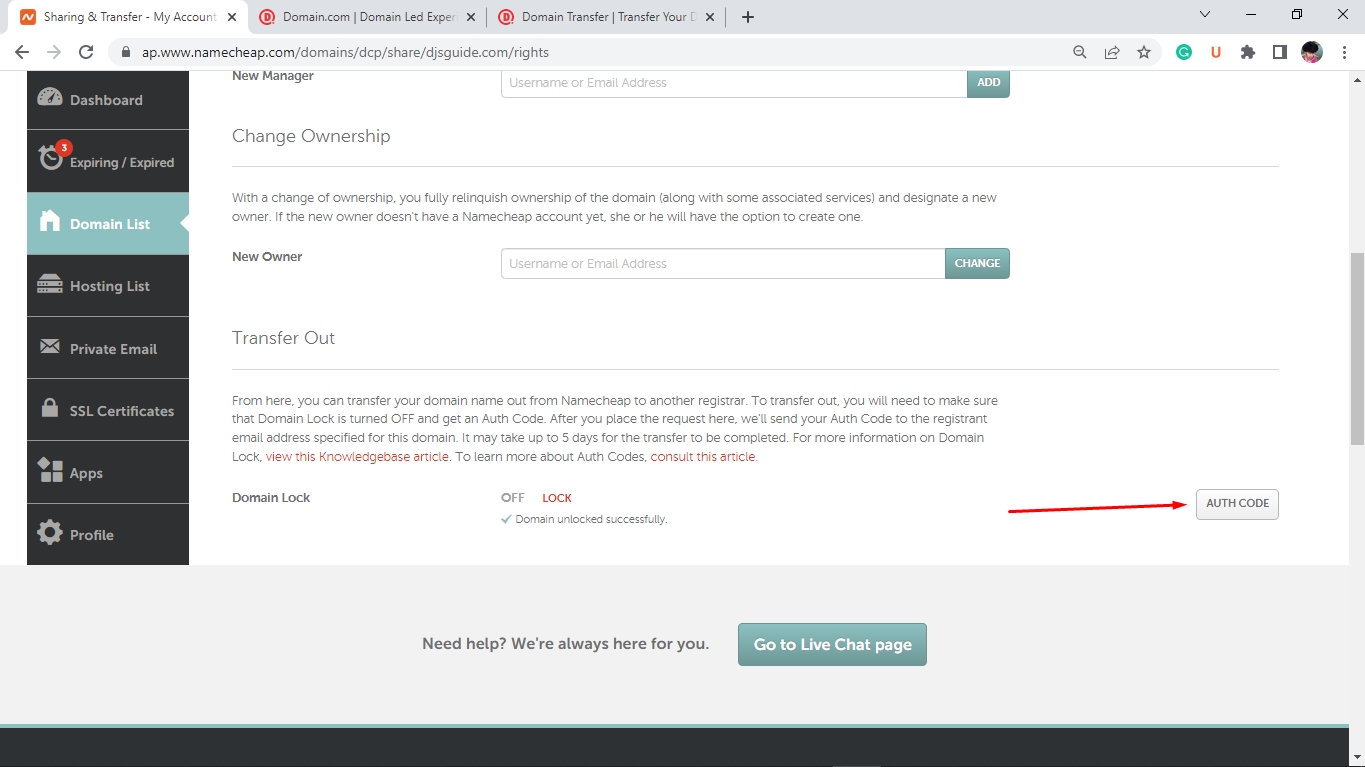
Scroll down to Transfer Out and UNLOCK your domain first.
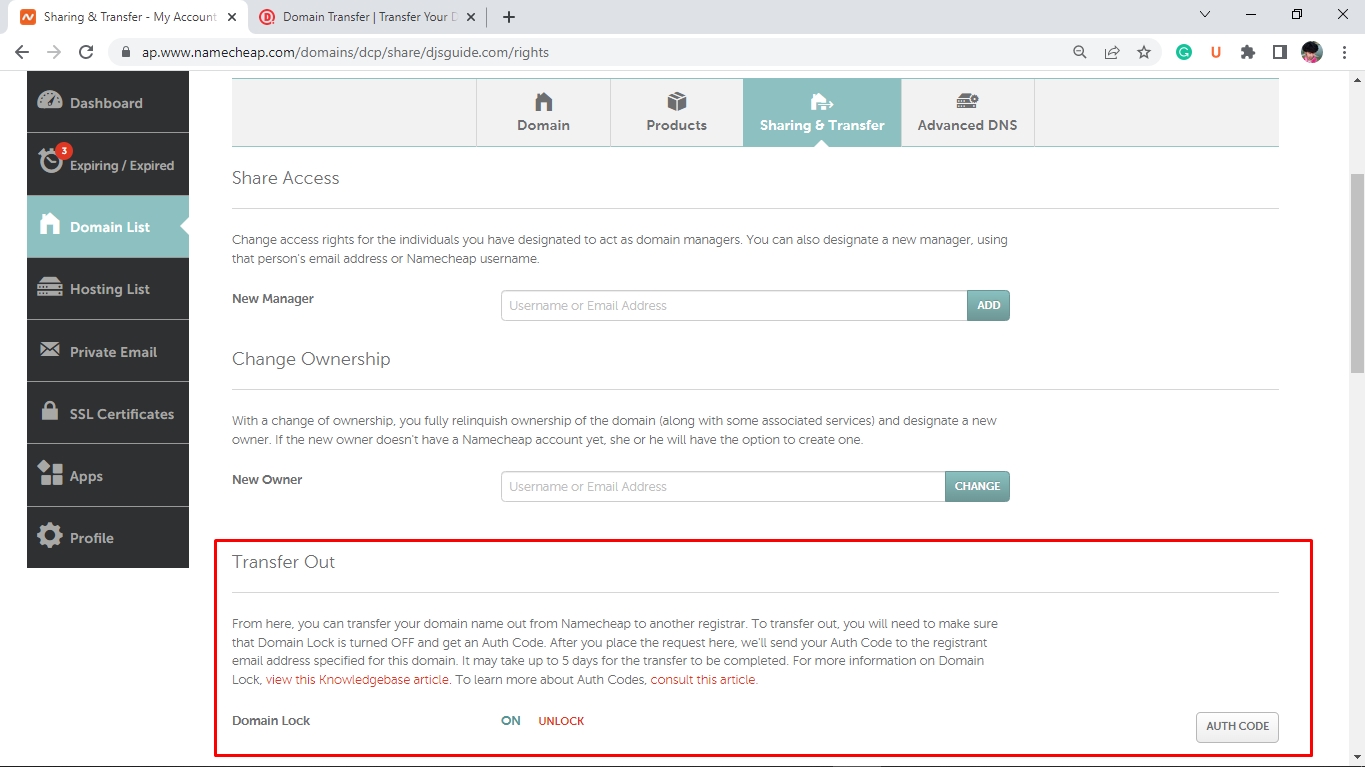
4. Get an Authentication Code
After the domain is successfully unlocked, click on AUTH CODE.
Then you’ll see a window about the transfer reason for why you’re transferring your domain out of your registrar, and you can describe a comment below.
Remember:
It may not ask for all registers, and even if it does ask, the type may be different.
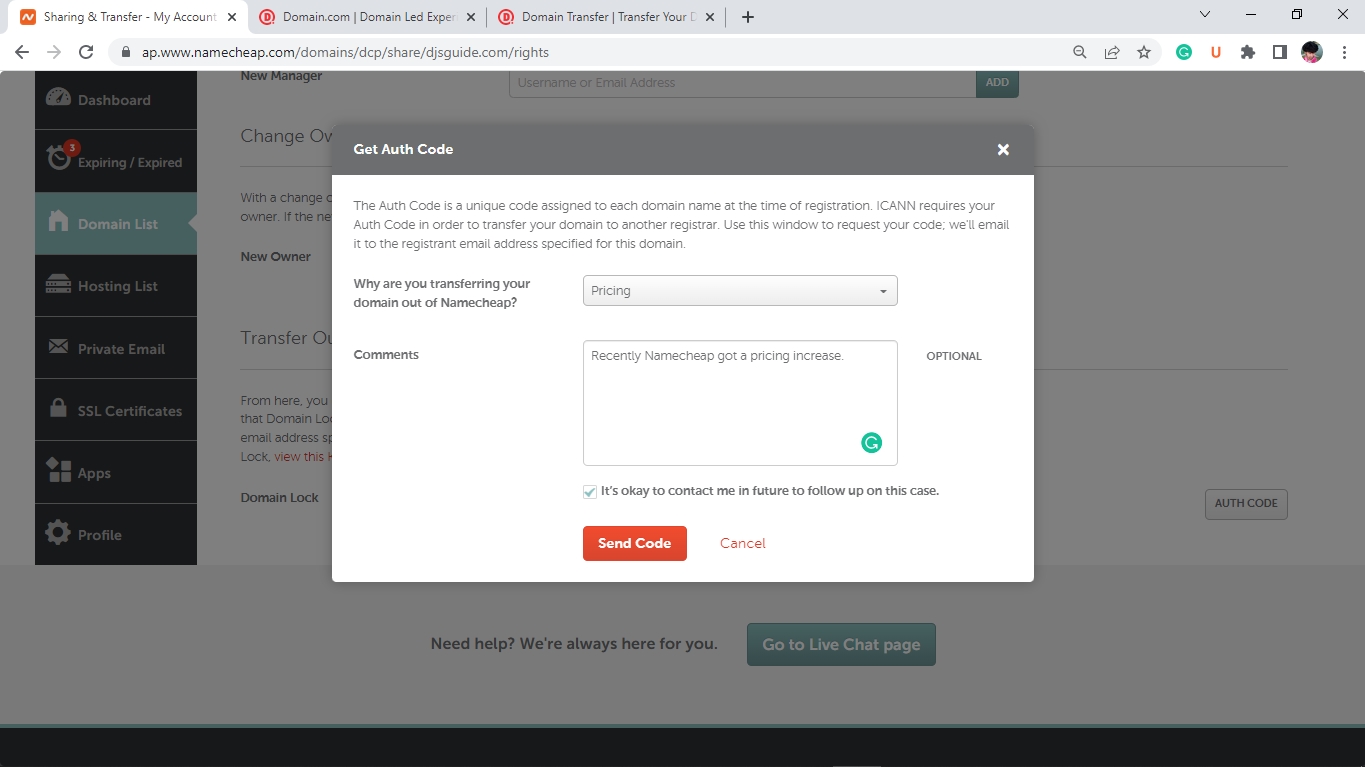
Then click on Send Code to receive the EPP code straight to your registered e-mail address.
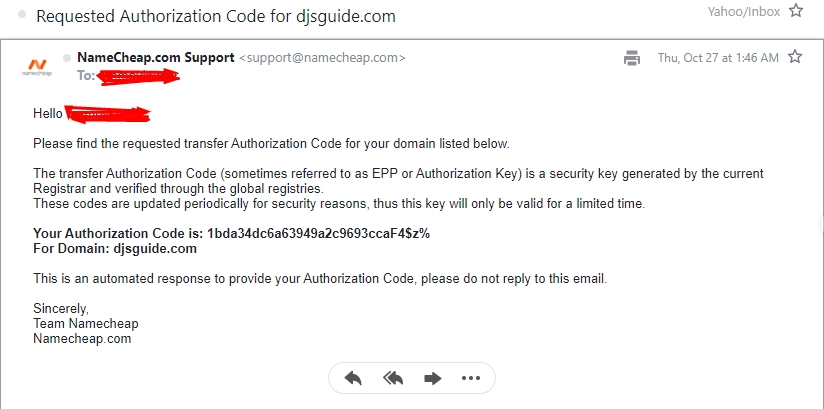
After submitting the request, I immediately got my code in my email, and I hope you’ll get it too! Now it’s time to move on to domain.com.
5. Create or Log in to your existing Domain.com account
If you’ve got your domain.com account, log in to it or create a new one for free and log in with your username or domain name and password.
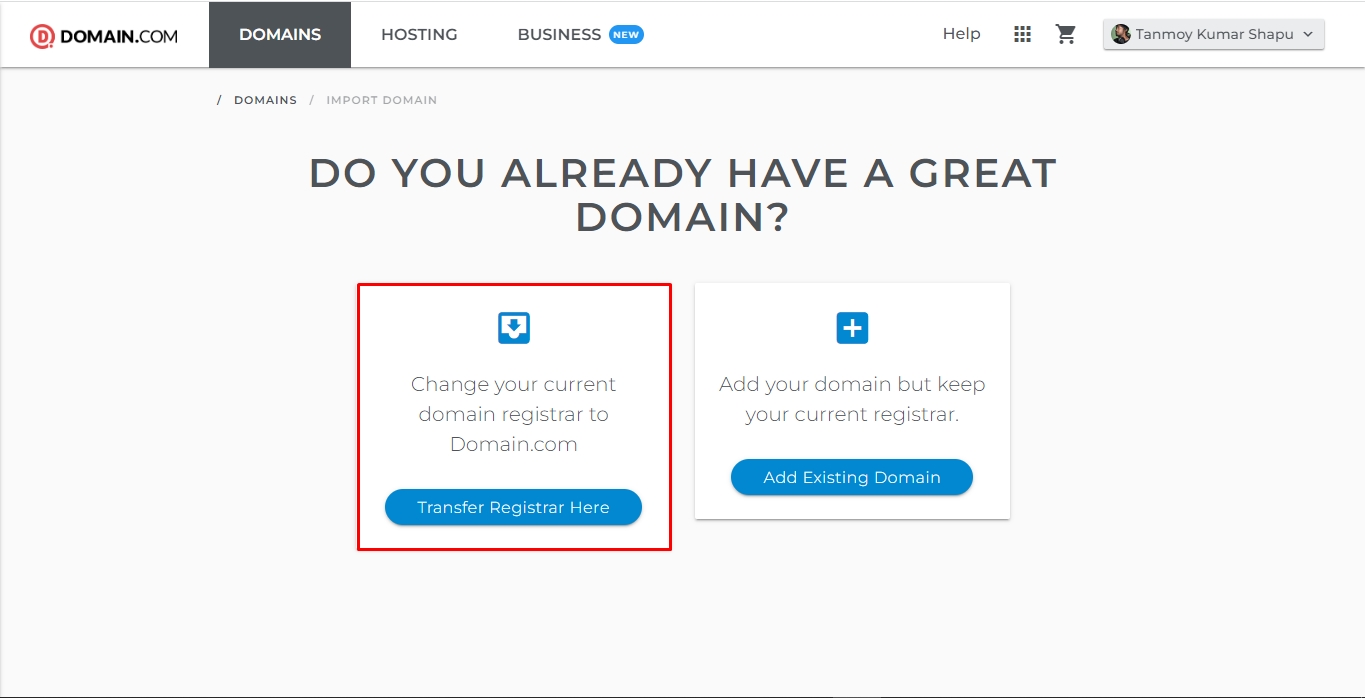
6. Transfer your domain to Domain.com
After logging in click on the “Transfer a Domain” button.

Then you will get two options: one is “Change your current domain registrar to Domain.com,” and another is “Add your domain but keep your current registrar.”
In this guide, we will choose the first option, otherwise, the second option means you can import domains from other registrars here to use with domain.com’s web hosting, SSL, e-mail hosting, etc.
Enter the domain you’d like to transfer, along with the transfer code your current registrar provided, similar to the below:

Then click the “Transfer Domain” button to proceed with the next steps.
Once domain.com verifies the authentication code and validity of the domain name, you will immediately be redirected to the CART page, where you will need to review your item and payment information to complete your purchase!
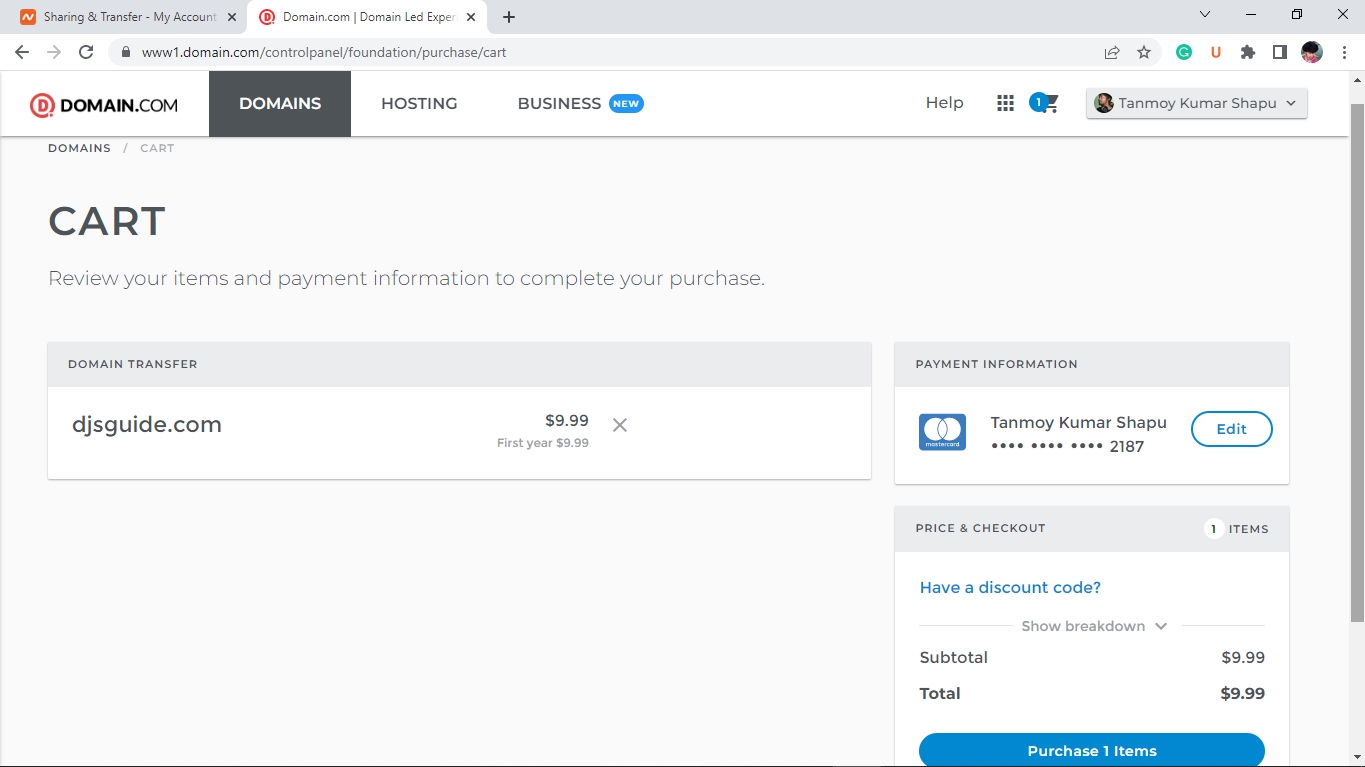
Then click on Purchase (1 or more) Items button and you’ll see a Thank You page with the purchase details.
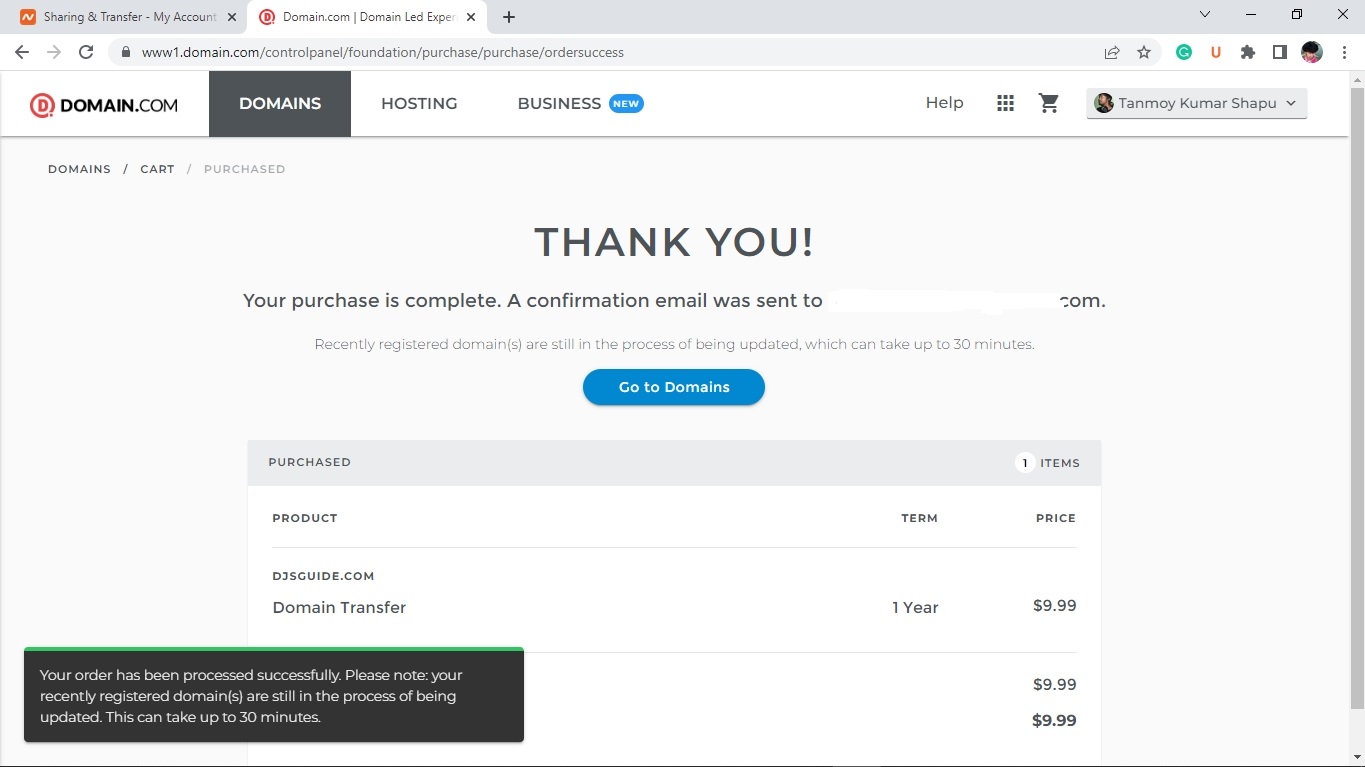
As you can see in the image above, my purchase was completed, and I also received a confirmation e-mail from them.
If you have also completed the purchase of your domain and received the confirmation email, you have three options to initiate your domain transfers:

- If you want to PROCEED with the transfer, you do not need to do anything.
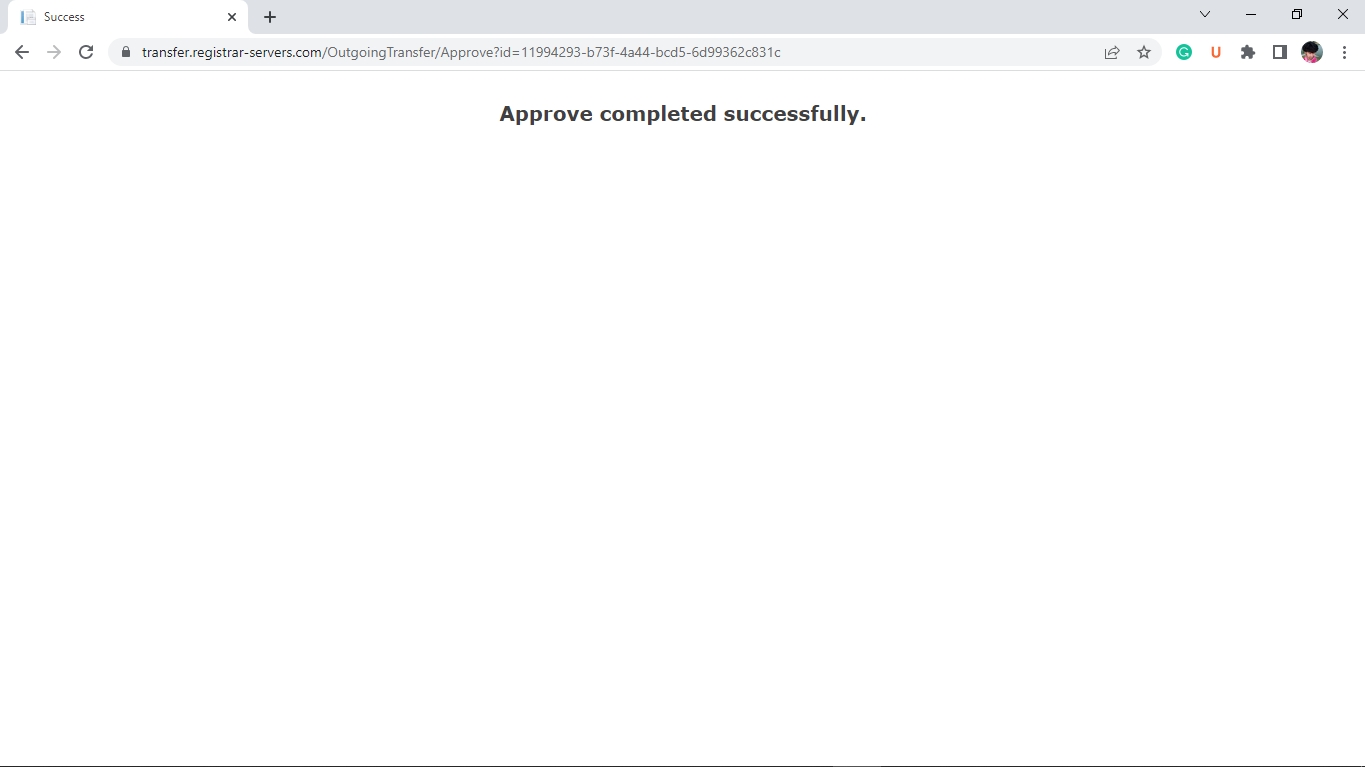
- If you want to SPEED UP the transfer, please go to their website and click on Approve.
- If you want to CANCEL the transfer, please go to their website and click Reject.
Then you need to click on the SPEED UP transfer request website link and click “Approve” to complete the transfer immediately instead of waiting for 5-7 days to be automatically transferred.
Here’s what it looks like:

Approve completed successfully.
Conclusion:
So the domain transfer from Namecheap to Domain.com has been completed.
I hope you were able to transfer your domain or will be able to if you followed the entire guide.
If this article was helpful for you! Please share this on your favorite social media site or blog, and if you have any questions, feedback, or suggestions regarding this post, feel free to reach out to us using our contact form or leave a comment below!
We’ll be happy to hear your thoughts.